
This time, I want to show how to create simple custom animation brush in the GIMP.
- Create new canvas, mine is 133x80 px. If you want the brush have independent color. Create canvas with RGB mode, fill with transparency. If you want the color of the brush depend from the brush dialog, use Grayscale mode, fill with white (not foreground or background).
- Create your image, maybe you want to create to another layer so you can edit later. Or, open example image as new layer. This image originally from deviant art, a photoshop brush. Then I convert into .png with some converter.
- Merge down this image's layer (right click - merge down).
- Create new layer. Like first layer, fill with transparency if you want color-independent brush. Or fill with white for color-dependent.
- Like step 3, merge down this last layer.
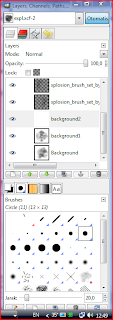
- The result is layer with image with white background.
- Repeat step 4 and 5 until all your image is inserted.
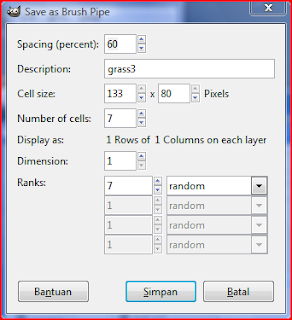
- Save as GIMP animation brush (.gih). Of course you can save as .xcf for later editing. This image right is just example (my work). Because mine has 7 image total (7 layer). I'm using ranks = 7 so that all 7 images will show when brush is used. Random means the images will show randomly as you move the brush.
- Is done! Just copy your new created brush to Brush folder and it's ready.
- Time to test your new brush. Click refresh in brush's dialog and your new brush will shows up.


This is my brush.

