If you writing a experiment report or something,
maybe you want to include table of contents (or TOC for short) for you report. I'l show you how..... First thing first, after everything is set, you must insert page number, don't forget that. This is my example. After do that, follow all steps below :
- block the word you want to use as entry word on TOC. Like below....

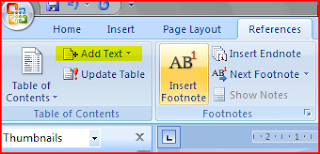
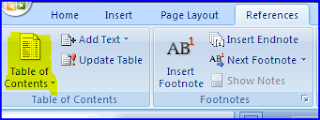
- on "references" tab, click "Add text"
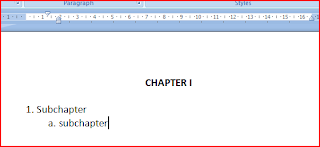
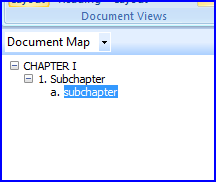
- select the level you want. For example, in picture above, I'm using "chapter I" as level 1 in table of contents, "1.Subchapter" as level 2, "a. subchapter" as level 3.
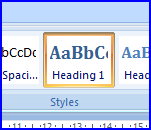
- If you found the word you've selected changed. You can change manually. Or, you can modify "Heading 1 default" right-click on "heading1" at "home" tab. This is the default format for level 1 heading (you can change later after adding TOC).
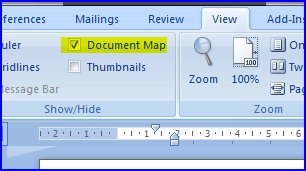
- after you have entered all entry word, try to view your document map.
- If you see unwanted entry on your document map, just click on your map to jump on tha entry. Block that word, on "references" tab, click "Add text". You will found that corresponding level is cheked. Simple check "do not show in table of content". This will remove from entry. just check on your document map.
- If all set, jump to page you want the TOC to be inserted. On "references" tab, click "table of contents" and select "automatic table".

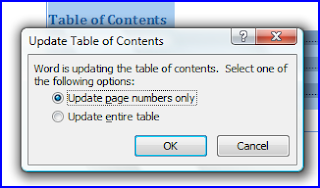
- After you've edit some pages, you may want to update your TOC. you can do this by clicking "update", it usually located at the top of your TOC.
- you can change the format of your table entry, but do this after you've update your entire table.
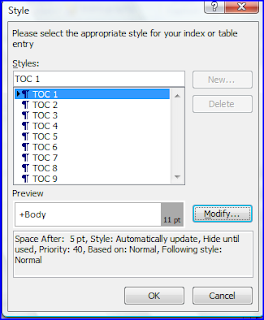
- You can change heading for your TOC by clicking "table of contents" on "references" tab and selecting "insert table of contents". this will show "TOC" dialog. Click "modify" button. Select the level you want, click "modify". On "style based on" you can select from heading if you've change the default heading or just simply edit the format.
thats all. Now you have a TOC.